Tuesday, October 19, 2010

Different Background on Different Page

If you have read my past few posts, you might have already guessed that I will be using conditional codes heavily in this tutorial. Anyway, you actually have different background on different pages. What you need to achieve this? Well, you must at least know how to change your regular main page background using CSS code. You see, there are many page templates and each of them have different ways to address to something, so you must at least do a little homework and try to change it first on the main page.

You can Checkout my test blog for a sample result. Link tab and Contact tab have different backgrounds:

http://yoboytestblog.blogspot.com/


Anyhow, you can try the following to see if your background can be changed using the following code:

From your Dashboard - Design - Page Elements - Advanced - Add CSS and paste the following code, see if your background is changing. 

body{
background: url('http://farm3.static.flickr.com/2604/3977045139_c00ae395ca_b.jpg') center;
}

(Remove this code after testing)

Step 1:

From your Dashboard - Design - Edit HTML - Find for </b:skin> - Place the following code below </b:skin>

<b:if cond='data:blog.url == &quot;http://yoboytestblog.blogspot.com/p/link.html&quot;'>
<style>
body{
background: url('http://farm3.static.flickr.com/2604/3977045139_c00ae395ca_b.jpg') center;
}
</style>
</b:if>

<b:if cond='data:blog.url == &quot;http://yoboytestblog.blogspot.com/p/contact.html&quot;'>
<style>
body{
background: url('http://themes.googleusercontent.com/image?id=1OACCYOE0-eoTRTfsBuX1NMN9nz599ufI1Jh0CggPFA_sK80AGkIr8pLtYRpNUKPmwtEa') center;
}
</style>
</b:if>

To use this code in your blog, you gotta change the URL of the page that you want your background to be different, and the URL of the background itself. If you want 5 pages to have 5 different backgrounds, then you will 5 codes (in my example I only used 2). Where to get the URL of your pages? Go Dashboard - New Post - Edit Pages - View and there it is in your address bar. Can you change the background of a 'Virtual Page' like label page? You sure can, just put it's URL there.

Wow, this is a one step tutorial. Have fun.

Sunday, October 17, 2010

Adding an Already Added Gadget

In this quick tutorial, I will show you how to add an already added gadget. I am going to use Page Gadget as an example. As you might have guessed, if you have already added Page Gadget (and some other gadgets), you cant add it again for the second time. If for some strange reason you need the same gadget twice, this tutorial is for you.

If you already have a Page Gadget, remove it first before attempting this tutorial.


Step 1:

Go to Dashboard - Design - Page Element - Add a Gadget - And Right Click on the Plus sign next to the Pages Gadget - Copy Link Location (Using Firefox) - Close the window


Step 2:

Now, right click on your address bar - Paste - and click Enter. Then click Save. You will be back to your Page Elements and you can already see one page gadget. Do it one more time, right click on address bar - Paste - Save. Now you have two page gadgets. Position it wherever you want.


Enjoy.

Customize Tabs on Pages Gadget

This one is a real quicky. In this tutorial, you will learn how to customize the tabs and its links on the Pages gadgets.


Step 1:

View your blog. Use Firefox (or any other browser that allows you to view it's source) - Right Click - View Page Source - copy everything from <ul> to </ul>

Mine looks something like this:
<li><a href='http://yoboytestblog.blogspot.com/'>Home</a></li>
<li><a href='http://yoboytestblog.blogspot.com/search/label/homemade.html'>Homemade Posts</a></li>
<li><a href='http://yoboytestblog.blogspot.com/search/label/imported.html'>Other Posts</a></li>
<li><a href='http://yoboytestblog.blogspot.com/p/link.html'>Link</a></li>
<li><a href='http://yoboytestblog.blogspot.com/p/contact.html'>Contact</a></li>
<li><a href='http://yoboytestblog.blogspot.com/p/archive.html'>Archive</a></li>
<li><a href='http://yoboytestblog.blogspot.com/p/photos.html'>Photos</a></li>

Step 2:

Customize the links however you want. URL goes after href, and  the name of the tab is typed before </a>. And if you want your customizes tab to be your second tab, make it be your second line. So my customised tab looks something like this:

<li><a href='http://yoboytestblog.blogspot.com/'>Home</a></li>
<li><a href='http://yoboytestblog.blogspot.com/search/label/homemade.html'>Homemade Posts</a></li>
<li><a href='http://yoboytestblog.blogspot.com/search/label/imported.html'>Other Posts</a></li>
<li><a href='http://yoboytestblog.blogspot.com/p/link.html'>Link</a></li>
<li><a href='http://yoboytestblog.blogspot.com/p/contact.html'>Contact</a></li>
<li><a href='http://yoboytestblog.blogspot.com/p/archive.html'>Archive</a></li>
<li><a href='http://yoboytestblog.blogspot.com/p/photos.html'>Photos</a></li>

Step 3:

Copy this code, go to Dashboard - Design - Edit HTML - Check Expand Widget Templates - and delete everything before <ul> to </ul> and replace with the above code - Save template

That's it. Note that I have omitted a little effect of highlighted clicked tab for simplicity purposes. If you want this effect to be available, refer to the following tutorial as I mentioned in there how to achieve it.

http://southernspeakers.blogspot.com/2010/10/blogger-tips-setting-up-homepage_6156.html

Oh, and don't forget to back up your template before attempting anything. Have fun trying.

Saturday, October 16, 2010

Dedicated Separate Archive Page

This tutorial teaches you how to create a separate archive page, on a static page. That means, you'd be able to see a dedicated static page on your menu, on which you can click on to view your blog's archive. You can choose to display or not to display conventional archive gadget on the sidebar, that's totally up to you. Anyway, you can check out a sample here:

http://yoboytestblog.blogspot.com/p/archive.html

The idea behind this tutorial is to place the Archive gadget on all the pages, and then code it in such a way that it will only be visible on one selected static page. Before starting this tutorial, I am going to assume that you already have an Archive Static Page created and optionally Pages Gadget (menu bar) placed below your header.


Step 1:


Objective: To place and reposition Archive Gadget

If you don't already have an Archive Gadget, go to Dashboard - Design - Page Elements - Add a Gadget - Blog Archive - and place it above Blog Post (below will do fine as well) - Save


Doing this right, you will now see Archive gadget on top of every single page in your blog, including Static Pages.

Step 2:

Objective: To hide archive gadget from being displayed in all pages, except for one defined page.

Needless to say, that one defined page is our dedicated Archive page that you have created. If you have not already done so, go Posting - Edit Pages - New Page and just create a blank page with the title Archive.

Before we can hide our Archive gadget, we need to know how to address it. As usual, use Firebug to analyze what is the ID or class of the archive gadget. As in my case, it is known with the ID BlogArchive1, as shown in the image below:


To hide archive gadget from all pages except for the dedicated Archive page, go to Dashboard - Design - Edit HTML - find for </b:skin> and place the following code directly below </b:skin>

<b:if cond="data:blog.url != &quot;http://yoboytestblog.blogspot.com/p/archive.html&quot;">
<style>
#BlogArchive1{
display:none;
}
</style>
</b:if>

This code will hide the archive gadget from all the pages except for the page that you input in the first line. To use this code in your blog, change the URL to your Archive page's URL, and change the gadget ID accordingly, if it is not the same.

Having completed this step, you will have your blog as it was with the addition of having Archive gadget placed on your Archive page.

Step 3:

Objective: Remove other page elements from Archive page

Some of you might be already happy having completed step 2. But some of you might prefer to remove all the blog elements from the Archive page. So, use your firebug and find out which class or ID to address. Refer to the image below. Mine is known as Blog1. I believe almost all of you has the same ID as mine:


So, what I want to do now is, remove the blog post's elements from being shown on the archive page alone. To do this, go to Dashboard - Design - Edit HTML - Find for </b:skin> and place the following code directly below </b:skin>


<b:if cond="data:blog.url == &quot;http://yoboytestblog.blogspot.com/p/archive.html&quot;">
<style>
#Blog1{
display:none;
}
</style>
</b:if>

To use this in your blog, like usual, change the URL, and I doubt if you have to change the blog post's ID. Save your template then.

You are done! You have placed your Archive gadget on only your archive page. If for some known reasons you find that your blog's margin has not been level, please refer to this tutorial on how to fix this margin.

Dedicated Separate Archive Page

This tutorial teaches you how to create a separate archive page, on a static page. That means, you'd be able to see a dedicated static page on your menu, on which you can click on to view your blog's archive. You can choose to display or not to display conventional archive gadget on the sidebar, that's totally up to you. Anyway, you can check out a sample here:

http://yoboytestblog.blogspot.com/


The idea behind this implementation is to display Achieve gadget in all the pages, and then code it in such a way that i will only be visible in the Archive page.

Step 1:

Objective: Create and place your Archive Gadget.

To do this, go to Dashboard - Design - Page Elements - Add a Gadget - Blog Archive

Virtual Static Page with Selected Posts in it

I realized that this is another common effect that bloggers are trying to achieve but has no direct solution to it. So this tutorial is made especially for you guys. In this tutorial, you will learn how to link to posts sorted by a specific label, and place this link on your Pages Gadget or Menu Bar or Navigation Bar. If you still don't know what I am talking about, imagine a link on your menu bar which you can click on, and this link will bring you to a page similar to your main page, but with only selected posts in it.

Some bloggers are looking ways to achieve this using static pages. Unfortunately, you can't do it using a static page. Blog posts are dynamic, and static pages are static, the two certainly don't mix. However, we can simulate this effect. In this tutorial you will learn how to simulate an effect of having posts in a static page which already have texts or images. So it'd look like a normal static page, but with selected posts on it. And you don't need to waste a static page to do this! From here on, I will be addressing this page as Virtual Static Page.

So, in short, what you will get is a menu which has extra tabs on it, and when you click that tab, you will be brought to a page which has posts that you have specifically selected. In addition, you could also have texts or images there to act like a header of that page. You can check out my test blog here:


http://yoboytestblog.blogspot.com


The idea is is to show a HTML/Javascript gadget in all pages, add a CSS code to hide this gadget from all pages except for one defined page. This page is the label filtered page, which will have only selected posts on.

As usual, I'd suggest you to use Firefox with Firebug addon installed.

Update: If your template supports a horizontal Link List display, you might want to use the Link List instead of Pages Gadget. The catch? Your clicked tabs won't be highlighted. If you don't mind about it, check out the following tutorial, which is way easier compared to this one.

http://southernspeakers.blogspot.com/2010/10/customised-menu-bar-with-link-list.html

Step 1:

Objective: Create a menu bar

This is really easy. Go to Dashboard - Design - Page Elements - Add a Gadget - Pages. Place it below the header. Edit and customize the elements in the gadget as you want.


Step 2:

Objective: Place texts/images that you want to be displayed on this 'virtual static page' that we are creating.

For example, if your page is about 'My Bedroom', and you want all the posts related to Bedroom to be shown there, this is where you want to write an introductory statement about this page. You might want to say something like 'This page contains all the posts related to My Bedroom' and place a picture with it. Alternatively, if you want less work (much less), you can ignore this step. So your virtual page will consist of only your posts and you won't be able to add additional texts or images to it.

To place texts or images on your virtual page, go to Dashboard - New Post - Compose and start designing how you want the texts and the images to be. Once you are done, click on 'Edit HTML' and copy the entire code there. Next, go to Dashboard - Design - Page Elements - Add a Gadget - HTML/Javascript - Paste your code there. After that, reposition this gadget to be above the Blog Posts box. Refer to the attached image below.


Step 3:

Objective: Choose the posts that you want to be displayed on this 'Virtual Static Page'

To do this, go to Dashboard - Edit Posts - thick the posts that you want to be displayed - Click the 'Label Actions' dropdown - New label - Enter a new label, but there are a certain rules that you must follow.

The labels must not contain spaces. So a single word will be preferable. If you must use two or more words, use dash (-) in between them, like 'my-bedroom'. Also, you must end the label with .html . Weird uh? There's a reason to it which you will understand. So your labels will look something like this:


You do not have to label posts this way if you don't want to include them in your virtual page.

Step 4:

Objective: Hide labels from each post.

Why do you wanna do this? Surely it looks awkward seeing a label with the .html tag as its suffix, so we'd disable all the labels from being shown in the posts. To do this, Dashboard - Design - Page Elements - Click edit on Blog Posts - Uncheck Labels - Save.

If you can't remove it for some unknown reason, you can code it out. Go to Design - Template Designer - Advanced - Add CSS - Paste the following code there.

.post-labels{
display: none;
}

Step 5:

Objective: Create Menu Tab for the Virtual Page

Now comes the real thing. This is where you will do something to create a tab in the menu, which you can click on to bring you to the virtual page. While actual tabs are highlighted when it has been clicked on, I'm gonna remove this effect for simplicity purpose of this tutorial. If you insist on having this effect, please refer to my previous post.

To do this, view your blog (using Firefox preferably, or any other browser that allows you to view its page source). Then right click - View Page Source - and copy everything from <ul> to </ul>. Mine looks something like this.

<li class="selected"><a href="http://yoboytestblog.blogspot.com/">Home</a></li>
<li><a href="http://yoboytestblog.blogspot.com/p/link.html">Link</a></li>
<li><a href="http://yoboytestblog.blogspot.com/p/contact.html">Contact</a></li>
<li><a href="http://yoboytestblog.blogspot.com/p/archive.html">Archive</a></li>
<li><a href="http://yoboytestblog.blogspot.com/p/photos.html">Photos</a></li>

Remove the texts class='selected', so it'd look something like this:

<li><a href="http://yoboytestblog.blogspot.com/">Home</a></li>
<li><a href="http://yoboytestblog.blogspot.com/p/link.html">Link</a></li>
<li><a href="http://yoboytestblog.blogspot.com/p/contact.html">Contact</a></li>
<li><a href="http://yoboytestblog.blogspot.com/p/archive.html">Archive</a></li>
<li><a href="http://yoboytestblog.blogspot.com/p/photos.html">Photos</a></li>

Now I am going to add the following extra line to the above lines:

<li><a href="http://yoboytestblog.blogspot.com/search/label/homemade.html">Homemade Posts</a></li>

If you want your virtual page to be on your second tab, then add the above line in place of your second line. The format of the line is as such:

<li><a href='http://<blog-url-here>/search/label/<label including .html suffix here>'>Text to be displayed on tabe here</a></li>


The label that I used is homemade.html. I also have another label called imported.html. I want these two virtual pages to be my second and third tab. So my pagelink list will be as follows:


<li><a href="http://yoboytestblog.blogspot.com/">Home</a></li>
<li><a href="http://yoboytestblog.blogspot.com/search/label/homemade.html">Homemade Posts</a></li>
<li><a href="http://yoboytestblog.blogspot.com/search/label/imported.html">Other Posts</a></li>
<li><a href="http://yoboytestblog.blogspot.com/p/link.html">Link</a></li>
<li><a href="http://yoboytestblog.blogspot.com/p/contact.html">Contact</a></li>
<li><a href="http://yoboytestblog.blogspot.com/p/archive.html">Archive</a></li>
<li><a href="http://yoboytestblog.blogspot.com/p/photos.html">Photos</a></li>


Now that we have customised our menu links, we want to put this into effect. Go to Dashboard - Design - Edit HTML - Click on Expand Widget Templates - find for the following lines:

<b:loop values="data:links" var="link">
<b:if cond="data:link.isCurrentPage">
<li class="selected"><a expr:href="data:link.href" href="http://www.blogger.com/post-edit.g?blogID=1430937011014702882&amp;postID=6822714966089027203"><data:link.title></data:link.title></a></li>
<b:else>
<li><a expr:href="data:link.href" href="http://www.blogger.com/post-edit.g?blogID=1430937011014702882&amp;postID=6822714966089027203"><data:link.title></data:link.title></a></li>
</b:else>
</b:if>
</b:loop>

Delete these lines and place our custom made lines. So this particular portion of our code will look something like this:


Click on save template then. You are almost done. If you did not place any text or images in your virtual page, there is nothing left for you to do. You can view your blog, and there will be extra tabs on which you can click on, and you'll be able to see the posts that you have picked (labelled) there. However, if you have chosen to place an image or text on this particular virtual page to make it look like a static page, there is one extra job to do.

Step 6:

Objective: Customize your Virtual Static Page by adding page-specific texts or images


In Step 2, you have placed an HTML/Javascript gadget on top of your Blog Post to act as an introductory design to your virtual page. The only problem is, this text/image is being shown in all the pages. So what we gonna do now is to specifically code the template to only show this design in the specifically defined virtual page.

To do this, first you want to know how to address the HTML/Javascript gadget. If this is your first HTML/Javascript gadget, by default it will be addressed with the id HTML1. However, just to be sure, use Firebug to inspect what is you actual gadget's ID. Mine is HTML1, as shown below:


Now that we have known our ID, we want to write a code specifically to make this gadget invisible on all the pages, except for one page that we define. This is the code that you want:

<b:if cond="data:blog.url != &quot;http://yoboytestblog.blogspot.com/search/label/homemade.html&quot;">
<style>
#HTML1{
display:none;
}
</style>
</b:if>

To use this code in your template, you'd have to change the URL to the virtual page's URL, and change the gadget ID if it is not same as mine. Next, we want to place this code in our template.

Go to Dashboard - Design - Edit HTML - and find for </b:skin> - and place the above code directly below it, and click save template.

You are done! If you have done everything correctly, when you visit your blog, you will see the same main page like always with your posts being there, and additionally you will have one (or more) tabs on your menu. You can click this tab, and it will bring you to a virtual static page which has it's own text or images and a bunch of selected posts.

Step 7 (Optional):

Objective: Margin Fix

After executing Step 6, you might notice that all the pages (except for your intended virtual page) has gone a little lower. Well, there's a quick fix to it. Use your firebug to inspect your blog's ID.


This page element can be addressed by the class column-center-inner (in my case). And I want to bring this element a little bit upward in all my pages, except for the virtual page (since the virtual page is already level as it is). So this is the code that I will be using:

<b:if cond="data:blog.url != &quot;http://yoboytestblog.blogspot.com/search/label/homemade.html&quot;">
<style>
.column-center-inner{
margin-top: -25px
}
</style>
</b:if>

To add this code, go to Design - Edit HTML - Find for </b:skin> - and place the above code directly below </b:skin>

You're almost done again!

Step 8 (Optional):

Objective: To remove the tag "Showing newest posts with label imported.html. Show older posts"

In your blog, if you have a post which is newer compared to the latest post in your virtual page, you will be greeted with a tag that looks like this:


You can remove this by adding the following CSS code:

.status-msg-wrap{
display: none;
}

Go to Design - Template Designer - Advanced - Add CSS - Paste the above code there.

That is it. You are done. In this tutorial, I have only added one HTML gadget to introduce one Virtual Page, though I have two virtual pages in my menu. Similarly, you can two HTML gadgets to address both of the virtual pages. Be sure to go through Step 6 and Step 7 to make the texts and images to be shown at their respective pages.

Happy trying.

Friday, October 15, 2010

Blogger Tips: Setting Up Homepage

I went through lots of articles on how to give your blogger (blogspot) a website look. By website look I mean a navigation bar (menu) and a homepage when you type in your domain, like the one I have here in my test blog:


http://qwertyyyyyyy.blogspot.com/

By default your index page, which is the page that you'd get when you type in a domain, is the page where your main post body is located. Thus, when you visit a blog, you'd see posts in your index page. Whereas in a website, usually an index page is an introductory page, and you'd be able to click a tab from the menu to bring you to the blog/posts page. This is what we are trying to achieve in this tutorial.

One usual way is to publish a homepage post with it's date set far out in the future, so that it'd always be at top. Then the number of posts to be displayed on the main page is set to 1. This way, the homepage post will always be the first, and you'd have to click older post each time you want to read a post. That aint cool I thought.

In this tutorial, you'd be able to have a homepage, with no posts on it, and you can click on a tab to bring your reader to your posts. Like I said, less blog-like, more website-like. That's the advantage of this method. On the downside, this method is not so straight forward, and it involves some hardcoding. Something not so suitable for beginners, but feel free to try it out.


I'd suggest you to use firefox while trying this. with FireBug add on installed.

Step 1:

Create static pages. Few static pages to be exact. Be sure to finalize all your pages and stuffs before trying out this tutorial.

To create static pages:
Dashboard - New Post - Edit Pages - New page - and design whatever you want.

Usually static pages are Homepage, Archive, Links, Contact Me, Photos, etc. You can have up to 10 static pages. While you are at it, create one dummy page for later use.


Step 2:

Create your menu bar.

To do this: Dashboard - Design - Page Elements - Add gadget - Pages - just click ok and place it below the header.

Next, you wanna click on edit, and rename your main page to Welcome or Homepage or anything you like. Also, include the dummy page (which I have named Post) and unthick the actual welcome page.


Step 3:

Place welcome page on the main page.

First go get the HTML code from your static welcome page. To do this, Dashboard - Posting - Edit Pages - and click edit on your welcome/homepage. Click on 'Edit HTML' view and copy the entire code there.

Next, we wanna add this code to the main page. To do this, Dashboard - Design - Page Elements - Add a gadget - HTML/Javascript - Paste your code there.

Place your Gadget above the Blog Post box. Now, you can see your homepage in all the pages.


Step 4:

Display homepage only in the main page and remove posts from main page. 

It's time to get your gadget out - Firebug! Inspect what is the id/class of the html gadget and the main post. My main post's id is Blog1 and the HTML gadget's id is HTML2. See the image attached below.


Now that we have known our IDs, it's coding time. Go Dashboard - Design - Edit HTML - find for </b:skin> - Place the following below </b:skin>

<b:if cond='data:blog.url != &quot;http://qwertyyyyyyy.blogspot.com/&quot;'>
<style>
#HTML2{
display:none;
}
</style>
</b:if>

<b:if cond='data:blog.url == &quot;http://qwertyyyyyyy.blogspot.com/&quot;'>
<style>
#Blog1{
display:none;
}
</style>
</b:if>

Code explanation:
The first portion of the code is used to hide HTML gadget from all pages except mainpage. To use this in your blog, change the URL and the HTML gadget ID. The second portion of the code is used to hide posts from the mainpage. Again, customize this code by changing the URL and blog post's ID.

As of now, when you visit your blog's URL, you'll be greeted with your homepage, and none of your post will be visible on the front page. However, you've also noticed that there is no way for you to access your posts. Well, time for the next step.

Step 5:

Customize Menu/Navigation Bar.

Update: Some may find this step hard, so I've prepared another tutorial on how you can customize your Menu Bar using Link List instead of Pages Bar. It's much easier to use Link List to customize your Menu Bar, but you wont have your tabs highlighted when they are clicked. Check out the tutorial here.


First, view your blog using firefox. Right click on the page, and click on and view source. CTRL + Ffind for PageList1 . Scroll down and copy everything from <ul> to </ul> . Mine looks something like this:

<li class='selected'><a href='http://qwertyyyyyyy.blogspot.com/'>Welcome</a></li>
<li><a href='http://qwertyyyyyyy.blogspot.com/p/post.html'>Post</a></li>
<li><a href='http://qwertyyyyyyy.blogspot.com/p/links.html'>Links</a></li>
<li><a href='http://qwertyyyyyyy.blogspot.com/p/contact-me.html'>Contact Me</a></li>
<li><a href='http://qwertyyyyyyy.blogspot.com/p/archive.html'>Archive</a></li>

Next, open your notepad, and redesign the above code into the following form (refer to the attached image on what goes where. It aint hard, it sure looks confusing, but it is just a matter of copy and pasting):

<b:if cond='data:blog.url == &quot;http://qwertyyyyyyy.blogspot.com/&quot;'>
<li class='selected'><a href='http://qwertyyyyyyy.blogspot.com/'>Welcome</a></li>
<b:else/>
<li><a href='http://qwertyyyyyyy.blogspot.com/'>Welcome</a></li>
</b:if>

<b:if cond='data:blog.url == &quot;http://qwertyyyyyyy.blogspot.com/search.html&quot;'>
<li class='selected'><a href='http://qwertyyyyyyy.blogspot.com/search.html'>Post</a></li>
<b:else/>
<li><a href='http://qwertyyyyyyy.blogspot.com/search.html'>Post</a></li>
</b:if>

<b:if cond='data:blog.url == &quot;http://qwertyyyyyyy.blogspot.com/p/links.html&quot;'>
<li class='selected'><a href='http://qwertyyyyyyy.blogspot.com/p/links.html'>Links</a></li>
<b:else/>
<li><a href='http://qwertyyyyyyy.blogspot.com/p/links.html'>Links</a></li>
</b:if>

<b:if cond='data:blog.url == &quot;http://qwertyyyyyyy.blogspot.com/p/contact-me.html&quot;'>
<li class='selected'><a href='http://qwertyyyyyyy.blogspot.com/p/contact-me.html'>Contact Me</a></li>
<b:else/>
<li><a href='http://qwertyyyyyyy.blogspot.com/p/contact-me.html'>Contact Me</a></li>
</b:if>

<b:if cond='data:blog.url == &quot;http://qwertyyyyyyy.blogspot.com/p/archive.html&quot;'>
<li class='selected'><a href='http://qwertyyyyyyy.blogspot.com/p/archive.html'>Archive</a></li>
<b:else/>
<li><a href='http://qwertyyyyyyy.blogspot.com/p/archive.html'>Archive</a></li>
</b:if>


Function of the code? To highlight the current tab that has been selected from the menu. If you couldnt care less about it, just keep it as it is (the original form like how you have copied from the page source). Don't change the sequence. Note that for my second tab AKA Post tab AKA Dummy Page Tab from step 1, I have changed the links from http://qwertyyyyyyy.blogspot.com/p/post.html to http://qwertyyyyyyy.blogspot.com/search.html . Do the same in your blog, the format is something.blogspot.com/search.html

 Why do this? Well, since we have removed the index page from showing the blog's posts, we have to find someway to display the blog's posts. And we need an address that can be linked to the tab. The above link works just fine, though I am sure there are more than one way to do it.

Next, copy the code that you have generated, go to Dashboard - Design - Edit HTML - Check Expand Widget Template - Find for the following lines:

<b:loop values='data:links' var='link'>
<b:if cond='data:link.isCurrentPage'>
<li class='selected'><a expr:href='data:link.href'><data:link.title/></a></li>
<b:else/>
<li><a expr:href='data:link.href'><data:link.title/></a></li>
</b:if>
</b:loop>

Delete these lines and replace with your custom made codes. Save your templates.

Step 6 (Optional):

Margin fix.

When you visit your blog, you'll be greeted with your homepage now. You have a lovely set of menu at top, in which you can click on it to show your blog posts. But you might notice that the boxes for all the posts (except for your homepage) are a little bit down.


There's a quick fix for it. Use Firebug to see what's the id or class of the box. As in my case, it is known as column-center-inner. I want to pull it a little upward for all my pages except for my homepage, so this is the code that i'll use:

<b:if cond='data:blog.url != &quot;http://qwertyyyyyyy.blogspot.com/&quot;'>
<style>
.column-center-inner{
margin-top: -20px;
}
</style>
</b:if>


Place it below </b:skin>, similar to step 4. Voila, it's done!!


All these steps and what you achieve? A homepage with no posts to greet you and a menu which you can click on to bring to your posts. Worth it? For cosmetic purposes no, for hacking purposes yes. Happy trying.
Wednesday, October 13, 2010

Transformers Leader Class Starscream Review

Another precious gift from my Girlfriend. This time, Transformers Hunt for the Decepticons Leader Class Starscream. A really slow, detailed, step-by-step review made specifically for the beginners. As usual, Robot to Alternative Mode (F22 Raptor Jet) review.


Tuesday, August 31, 2010

Paranormal Activity caught on tape - again

Our camera took another hit again. But things didn't turn out the way we have wanted. We have heard lots of noises from the ceiling lately so we decided to put some powder directly below our attic opening in hope of recording something supernatural. See for yourself what the camera has picked up. Note: We have gone to bed after setting up the camera. When we woke up the next morning, the battery has already drained. It has recorded for almost 3hours +. To ease your viewing experience, I have trimmed the parts which has no activity in it, and fast forwarded some others. You might wanna increase your volume to hear things out.

How did you celebrate your Merdeka?

I celebrated mine by eating Maggie 1Malaysia..

Saturday, August 21, 2010

Paranormal Activities Caught on Camera at Home!

Nowadays I sleep late. Like 8am late. I know it'd sound stupid when I say this, but I've been hearing lots of funny noises. When these noises are heard, usually everyone else would have long been on bed. Usually I'd blame it on Yuri (our 3-month-old puppy). But recent chains of events have suggested otherwise. So to actually find out what was going on, and to kill some time, I decided to investigate what has been happening. Most of the time, I'd keep my computer room door open and I'd be with the computer, alone in the dark. I'd have clear vision of the living hall, and so far nothing unusual has been sighted. If there were needs for me to go upstairs, I'd set up my camera and then proceed. This has been going on for 2 weeks or so. But what was caught on tape last night was unexplainable, even for me. Never in my life I thought I'd see something real like this. You have to see for yourself to believe. Go ahead and download the video to analyse it if you have to. My advice, better trust in God, these things are real. Mark my words.


Wednesday, April 21, 2010

Digital Electronic Padlock


Hi guys.. Sorry for the lack of updates.. I've been a lil bit tied up with lots of things.. Mostly due to my Final Year Project. So here it is, Digital Electronic Padlock. This invention has been accepted for conference by the IEEE. I spent the last 1 year or so to design and implement this project. Every phase of this project has been challenging and entertaining. I had to teach myself a small portion of mechanical engineering-related-subjects to achieve completion. And I'm proud it has been completed now.

It is basically a padlock that does not require an analogue key. In return, you'd need a correct password to make the padlock unlock itself. When you enter a correct password, the padlock would unlock itself. Watch the video for a brief demonstration. Oh, did I mention that the padlock is water resistant?

Monday, March 08, 2010

The 'Tail' of a Pardoned Gecko


Today, while studying for my final year midterms, I realized that the baby gecko (cicak) I let live last semester has grown up to an adult size. Moreover, it was making annoying sounds. I decided to let it die on its own via natural causes assuming it won't live long. Besides, catching a gecko in this part of my house (my study room) is relatively harder than other places, as my room is extremely messy with books and stuffs. I did a quick search and I learned that an average gecko could live up to 5 years. This gecko gonna outlive my hamsters . FML.


Thursday, January 28, 2010

Types of Hamster Bites

I have been having hamsters for quite some time now. And hamster bites are often underrated. Based on my observations, there are like four levels of hamster bites, as follows:

Kilo Bite - This bite occurs when a hammy do not know if your finger is something edible. So, it'd try to nibble your finger with its teeth. When it gets comfortable enough, it'd go to the next level. This bites normally occur when your fingers smell of food, thus confusing the hammies. These bites are usually harmless and sometimes you might even like it.

Mega Bite - When a hamster is certain that your finger is some kind of food, it'd go ahead and bite you, the same way it'd bite a treat or something. It could bleed at times. Hamsters with poor eye-sight tend to do this, especially the red-eyed ones.

Giga Bite - This is the most common bite of all. When a hamster feels threatened, it would attack you. Note that most of the time the hamster does not wait to find out what is attacking it, so it'd just go all out. Sleeping hamsters or nursing mother hamster tend to do this. Normally it is hurtful and it is almost certain that you'd bleed from this kind of bite.

Tera Bite - The most disastrous and least experienced bite of all time. If you do not agree with me, probably your have not gone to this ultimate stage. Have you ever wondered when two hamsters are fighting and biting each other, how'd it feel? If you think it'd hurt like the above three levels, you are wrong. The pain that hamsters try to inflict on other hamsters during a fight is extra-ordinary. It is very unlikely for a hamster to willingly attack a human with this bite. So, wanna know why is this bite so disastrous? Check out the video below.

Viewer Discretion Is Advised


The reality of the contents of the video largely depends on viewer's imagination capability.

Thursday, January 21, 2010

My Lil' Blue Dragon

Meet Bluey, my dragon..


Lol.. Don't judge me, it's so cool that I had to try it myself :P Try one now!
http://www.curiouser.co.uk/illusions/dragon/dragon.jpg

Wednesday, January 20, 2010

Namewee Vs TNB Malaysia

The video is self explanatory. WARNING: Video contains abusive language. Might not be suitable for small kids.

Friday, January 15, 2010

Melaka Marina Beach


So, there is a new beach in town - Marina Beach. It used to be some private property but the government (surprisingly) was kind enough to claim and develop it for tourism. Perfect spot for dating and fishing. One can also simply relax there while enjoying the sea breeze from the Straits of Melaka.


My dad showing a fish that I caught to the camera :)

Wednesday, January 13, 2010

My Front Yard

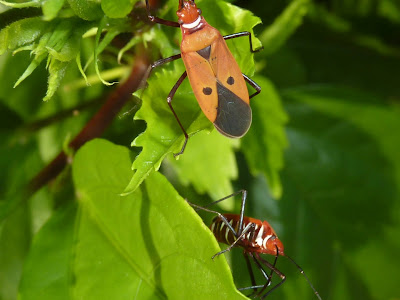
Here are pictures of some insects that can be commonly found at my front yard.. Blog updated.


Monday, January 11, 2010

Random Post

This blog has been all about hamsters and transformers toys reviews lately.. Not what I envisioned for when I signed up for this.. You cant blame me though, there aint nuthin much goin on in my country lately except for some.. erm.. for lack of a better word.. fools, busy fightin for sumtin so trivial in my opinion. Maybe I should rename the blog Southern Rodents or sumtin.. Or Cannibalism in Thailand for that matter.. Speaking of boring stuffs, here's a rare scene at my place..

A hot air balloon on the Dataran Pahlawan field.. The scene came along with dozens of pathetic couples sitting on the middle of the dark field surrounded by hundreds of blood thirsty mosquitoes while pathetically watching the hot air balloon.. What makes it sadder is the fact that these couples can be found here almost all the time, with or without the balloon..

On a lighter note, here are pictures of Katie's babies. They are 6 days old now :)

Wednesday, January 06, 2010

Hammy Updates!!

So, lots of things have happened since I last blogged about them. First of all, Katie gave birth, like y'all know.. But they didnt make it though, none of them did.. Then, Berry gave birth, and the next day, Julie did.. Owh, they are all Mica's not-so-desperate wives by the way.. And then, Julie's babies didnt make it as well.. But Berry, I have to give it to her.. It was unexpected, but she was the mother of the decade!!

So here they are, three new members to the family.. Known as the ABC Twins..
The one that looks like Berry is Amber. And of course there's another that looks like Berry, that is Babyface (previously knows as Baby Gaga, turned out he is a boy).. Then the brown one is, erm, the obvious, Chris Brown :P
So Amber + Babyface + Chris Brown = The ABC Twins


As for Katie, she decided to try again after a disappointing first start - only to come back meaner! She gave birth to 9 or 10 adorable pups this morning! Although Im not sure how many will make it though.. Oh, Panda is the father this time.


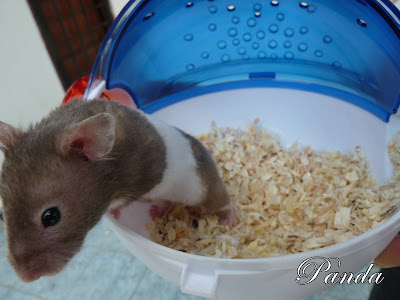
As for the others, Julie is living happily ever after with Mica. Redi has became a priest and he lives at the Hamster's Batu Caves in my house, and Panda is a hunk now. He has these six-pack abs and stuffs. And he is a model too. (Refer to the post below.

Panda Post!

Initially it was a combined post but there is this glitch with blogspot that doesnt embed youtube videos when Panda's photos are uploaded.. So, what do you know.. enjoy these pictures..

So, Panda is a hunk now. No, seriously. He has these six-pack abs and stuffs. And he is a model too. Hit the jump for more downloadable posters of Panda for your viewing pleasure :P